Papercutting Templates • Coloring Pages • Tutorials & Artsy Stuff by Rebecka Hathaway

SUBSCRIBE!

Get access to free downloads, coupons and fun stuff.

How to assemble my 3D Papercut Shadowboxes.

Shadowbox templates have been a huge seller for me recently. Yay! and Thank you!

This How-to Video is for you if:
You have purchased the template and need to know what materials to use, or maybe you have cut the layers but now you’re stuck.
Or you need to know if if you’re doing it right.

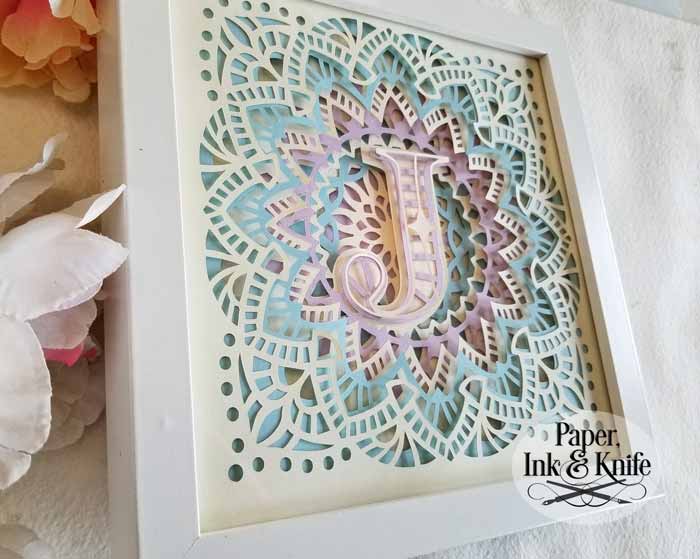
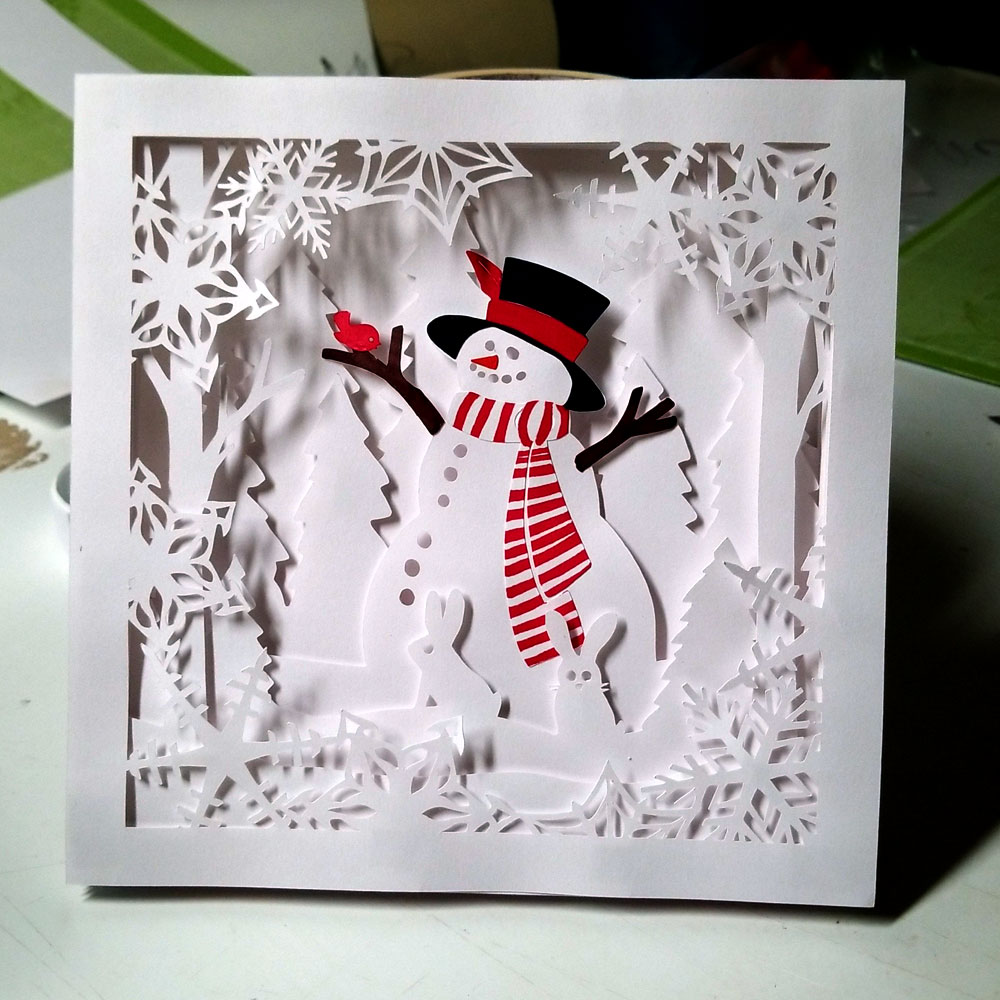
Below are some of my more popular layered shadowbox designs.
So pretty with or without lights.

The video shows assembly of the Lotus Shadowbox template. All of my shadowboxes go together the same way.

Assuming you have already purchased your template and cut it either by hand or with a craft cutting machine.
This is how you put it together. Quick and easy.

Materials needed: Shadowbox templates available here: Shadowbox Templates

Paper for cutting either with your machine or by hand. Cardstock or other heavy weight paper.
I use 65lb cardstock cut with a Cricut Maker- Read this post to see all of the papers and settings I like

Double sided sticky foam tape. The thickest you can find. I purchased mine from Dollar Tree. Available on Amazon, Walmart and other stores.

I do not typically use lights in my shadowboxes, so I don’t show adding the lights in the video.
If you want to light your box, you can find the fairy lights I have used on Amazon.
Optional battery operated Fairy lights. Link to the ones I use from Amazon.

Please share! Sharing my designs in your groups and with friends is so appreciated.

It's Rebecka Hathaway

It's Rebecka Hathaway

Artist - Dog Mom - Maker of Things

Kidnapped at a very early age and forced to live among humans, I’m on a continued quest to return to the magical world from whence I came.
Just kidding. (Maybe)
I’m sitting here in my little house drawing and doing geeky computer stuff to share with you so you can make pretty things too
Everybody’s an artist. Let’s be artists together.

5 Comments

  1. Jean

    Thank you, thank you! I did test run on one of your templates and was confused on which way the layers went. While it is probably intuitive, I have an overthinking mind (when it works!)

    Thank you for your templates and instructions!

    Reply
  2. Dee Archuleta

    Thank you Thank you Thank you
    Absolutely love your Heart Mandala. I made one for my grand daughter to put her two babies faces in it and now I want to make one for a friend. I know you had a suggestion for a font to use and for the live of me I can not locate it. Could I ask for a suggestion from you, I would really appreciate it.

    Reply
    • Rebecka.Hathaway

      Yay! I’m glad you’re having fun with my Heart design. As for a font, just look for one that is heavy enough to hold together when you cut it. Also needs to connect. I like Milk Shake and use it a lot. If you look on daFont or other font sites you’ll find a ton of great script fonts that will work.

      Reply
  3. Susan

    The snowman is adorable. Do you take out the piece of framing inside of the shadow box to make it fit or is there a deeper shadow box? With the spacers and paper seems too thick for Michaels shadow box.

    Reply
    • RebeckaHathaway

      Yes, I remove the spacer that comes in the frame. My 8×8 boxes, like the snowman, are a perfect fit for the 8×8 shadowbox frames from Michaels.
      I you are using thicker spacers, of course the frames aren’t deep enough.
      I use double sided foam tape which gives dimension, but still fits in the frame with room for the frame backing to hold it in.

      Reply

Leave a Reply to Jean Cancel reply

Your email address will not be published. Required fields are marked *

Let's Be Social!

Pin It on Pinterest